User Tools
Sidebar
Navigation
software:gui-designer:guidesigner-quick-start-guide
This is an old revision of the document!
Table of Contents
guiDesigner Quick Start Guide
| August 31st 2012 - This page is under construction and is not yet finished. Please check back soon for the full guide and a video guide. |
|---|
A video version of this guide is available here: http://cmdf.us/PC6I8d
What is guiDesigner
guiDesigner is a windows application that we use to develop graphical user interfaces for our iViewer application.
guiDesigner is a powerful tool that allows you to develop a very simple, or an amazingly powerful interface that can be utilised with almost any control system on the market today.
The only limit to guiDesigner, is your imagination.

Downloading & Installing guiDesigner
guiDesigner is available from the CommandFusion website.
Make sure that you have the Microsoft dot net 3.5 framework installed.
| It is important to make sure that you have the dot net 3.5 service pack 1 installed, as the dot net framework is not backwards compatible with guiDesigner. |
|---|
After you have downloaded guiDesigner, run the .exe file and install it as you would any other Windows program.
guiDesigner Layout
guiDesigners basic layout looks like this:
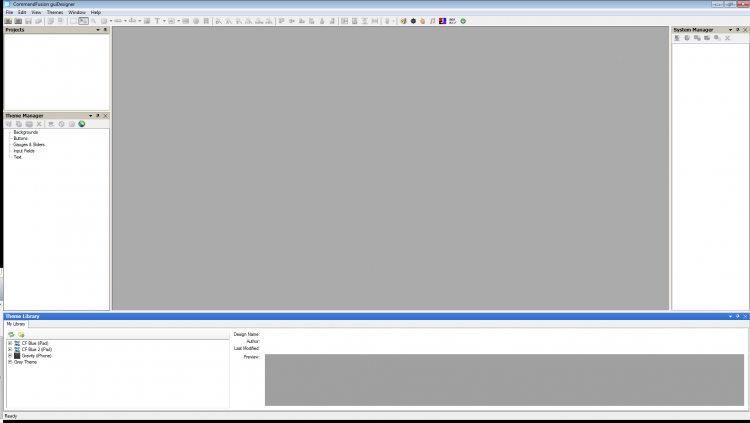
There are six basic parts of the guiDesigner program that are present is the default layout.
Projects Tree
This is where all Pages and Subpages for your project are shown.

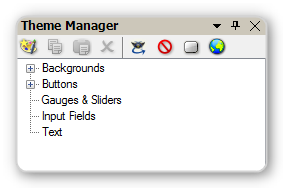
Theme Manager
This is where you define the themes that will be used for all objects in your GUI.
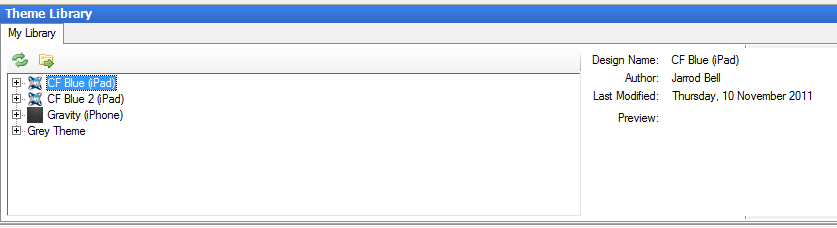
Theme Library
This allows you to use pre-defined themes within your projects. These themes can be created and shared by anyone, but at the moment it is a manual process. There are plans to make sharing easier in the future.
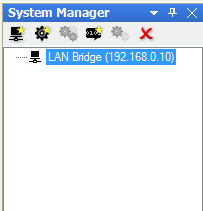
System Manager
This is where you create and manage the communications with your external systems, including commands, macros and feedback parsing within your GUI project.
Toolbar
The Toolbar allows for quick selection of some of the most commonly used tools in guiDesigner.
Workspace
The workspace allows for quick selection of some of the most commonly used tools in guiDesigner.
Creating Your First User Interface
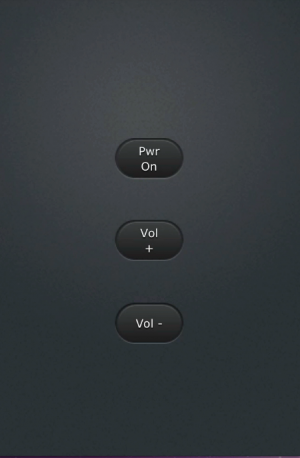
For this guide, we are going to create a very simple GUI on an iPhone, it will control a TV with a power button and volume up and down buttons.
Creating Your Projects
The first step is to create a new project. To do this, click on the new project button ![]() on the tool bar (or via the File menu).
on the tool bar (or via the File menu).
Then type in your projects filename. The file will not actually be created until you first save your project.
Press Ok.
This will then bring up the project properties dialogue.
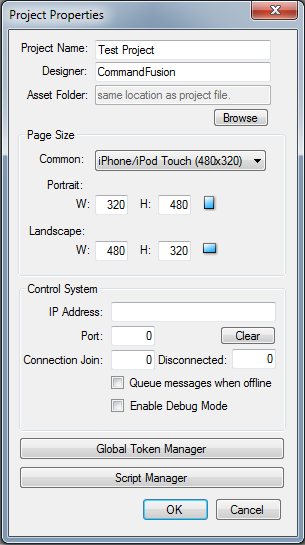
Enter a project name and designer name (both are optional).
The asset folder is where project assets such as images and sounds will be stored. By default this is set to the same folder as the project file.
We recommend you create a new folder for each project, so that all files for each project are nicely separated.
The page size is where you choose what device the GUI will be displayed on. For this project we will select iPhone. You can also set a custom size if required.
The control system, global token manager and script manager sections are not important for basic features and will be covered in another article.
Click OK
Pages & Sub-pages
Next we need to create some pages and sub-pages.
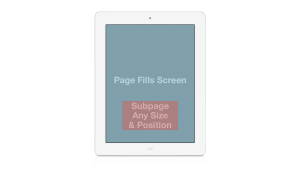
A page occupies the full screen and contains the GUI objects such as buttons and text. A sub-page is a user definable size that can be placed anywhere within a page - an example of a subpage might be a volume bar that you want to re-use across multiple pages.
To create a page, click the “create new page” button ![]() in the toolbar.
in the toolbar.
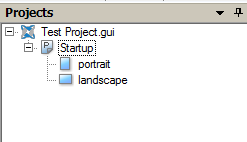
This creates a page called “startup” by default in the project tree. Under the page you have each orientation for the page. You can edit the contents of each orientation by double clicking on the appropriate page.
If you leave one of the orientations empty, then the GUI will be locked in the orientation which contains GUI objects.
We will be using only pages in this project, so go ahead and click the “create new page” button.
To create a sub-page, click the create new subpage button ![]() on the toolbar.
on the toolbar.
This brings up the subpage properties dialogue. Give the subpage a name, a background theme if required - by default it will be transparent. Then choose the size required for the subpage. We won’t be using sub-pages in this guide - it will be covered in a future article.
We now have a page in the project tree.
Themes
Before we add any objects to the pages, we need to create some themes that our objects will use.
In this case, we will use a pre-made theme from the theme library. We will be using a new theme called “Gravity” which will be released with the next version of guiDesigner.
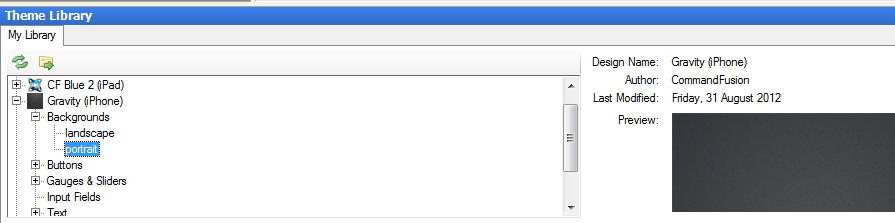
Go to the theme library, chose the Gravity theme.
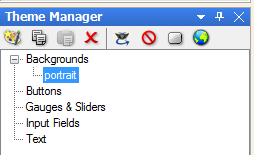
Click on backgrounds, and choose the portrait background and drag it to the theme manager. You can see a preview of the background in the preview section of the theme library
It will automatically be put into the correct theme category for your project and any necessary images will be copied to your project’s directory.
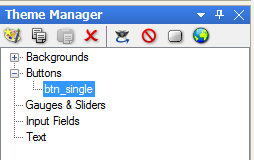
Now choose buttons in the theme library and scroll down to the button you want to use. We will be using btn_single for all the buttons in this project. The text shown in the preview window can be changed later on. Drag the button to the theme manager.
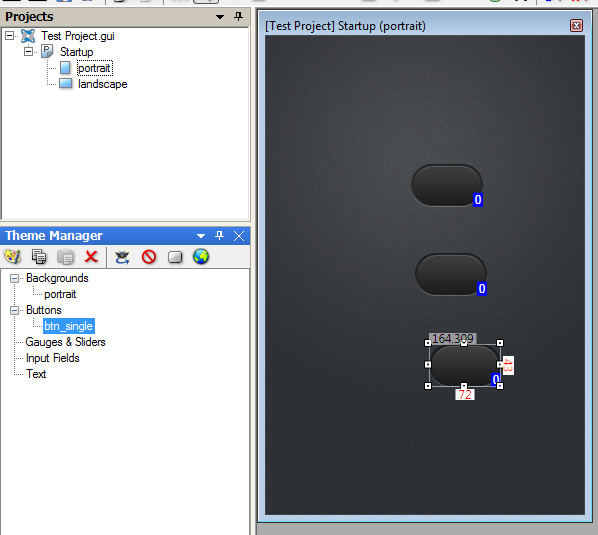
Now double click the page orientation in the projects tree that you want to edit. For this project we will be using only the portrait mode.
This will open up a blank editing window in the workspace.
Next, drag the background from the theme manager onto your open page.
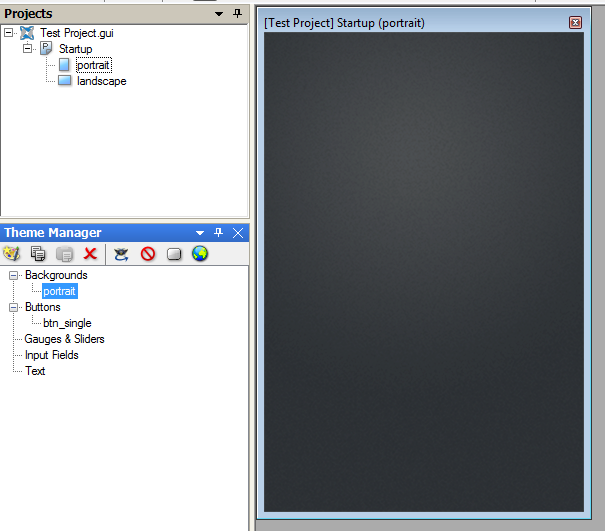
Next, drag the button onto the page, repeat this two times so we have a total of three buttons on the page.
software/gui-designer/guidesigner-quick-start-guide.1346640320.txt.gz · Last modified: 2012/09/03 02:45 by aaron